

Let’s face it - rubber stamps are an amazingly quick and easy way of marking something in real life, but recreating them in Photoshop is a little more difficult. Unlike real media, the electronic canvas does not have creases, folds, and underlying texture to distort the ink. Neither does an electronic stamp have problems with ink adherence, creating a unique effect every time it is used. That is not to say, of course, that Photoshop cannot reproduce these little nuances of real media. The aim of this tutorial is to describe a simple method to create grunge brushes, and to detail how these brushes can be used to reproduce realism in our rubber-stamped logos. Interested? Download pdf versionhere... or keep reading More...
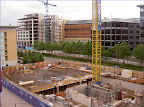
Open your photo stock which have a good separation color, in this case I used construction photo
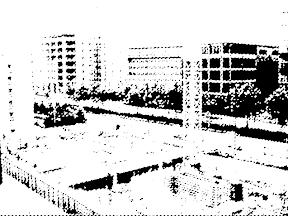
Now we need to overexpose contrast of the image. In menu Image > Adjustment > Threshold, and the dialog box should open. Drag the slider nearly all the way to the left, leaving only the most prominent lines and details present
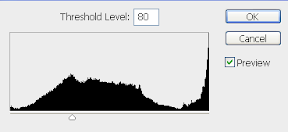
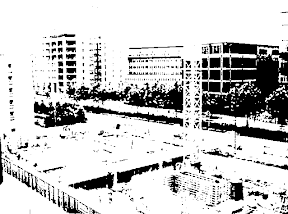
If you done with the setting then press OK. Leave it for a while.
Make a new file 640 x 480px with white background. Type your text with some bold font, I use Arial Black for example.
Now we need a border for the text and I use Rectangle Marquee tool and paint bucket tool to make it. Just simple way Rasterize the type via Layer > Rasterize > Type, this allow you to modify text like brush object. Then select the area and use paint bucket tool to color it.

Use CTRL + T to apply free transform tool to rotate the text layer.

Go back to the construction image photo. Now use Magic wand tool and select inside the black area. Expand your selection, in menu Select > Similar.
Press V button on your keyboard to activate move tool. Drag the selection area to your logo image. Or use Edit > Copy and Edit > Paste in the menu. And the "grunge" layers automatically go to the top of layer palette.

Select the "grunge" layer and hold down CTRL button and click on its icon. Without losing your selection area, click on your logo layer to activate it. Now press Delete button on your keyboard to delete the selected area. Then click the eye icon of "grunge" layer to hide it. And your "grunge" stamp is done.


0 comments:
Post a Comment