

More...
Create a new file with any dimension you like with black color as a background. Type your text on it use white as a color and font anything have big dimension.

On layer palette, right click on layer text and choose Rasterize Type. Now double click on it to show Style Blending option. Click on Drop Shadow and set Blend mode: Multiply, color: Black #000000, opacity: 50%, Angle: 120⁰, Distance: 5px, size: 10px. Don’t click OK yet, more to do.

Now click on Inner Shadow option. Set Blend mode: multiply, color: white #ffffff, opacity: 75%, Distance: 5px, Size: 10px, define Contour: Ring doubled, check box Anti-aliased.

Now on Inner Glow option Blend mode: multiply, Opacity:100%, Color: white #FFFFFF, Technique: softer, Source: Edge, Choke: 10%, Size: 75px.

In Bevel and Emboss option set Style: inner bevel, Technique: smooth, Depth: 75%, direction: up, Size: 15px.

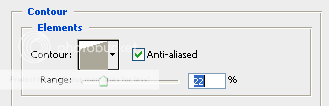
Click Contour option and click the thumbnail to set contour mapping . Set like image below the define Range: 22%.

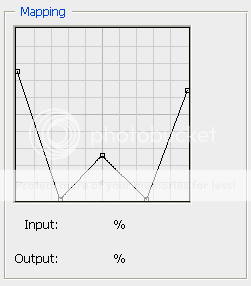
On Satin option set Blend mode: screen, color: white #FFFFFF, Opacity: 100%, Angle: 135⁰, Distance: 7px, Size: 11px, check box on Anti-aliased and Invert option, and custom the Contour mapping like image below.

On Color Overlay option define Blend mode: Normal, color: Black #000000, Opacity: 100%.

On Stroke option define Size: 1px, Position: outside, Blend mode: normal, Opacity: 80%, Fill type: color and choose the color hex #333333

After all that your should have layer style blending option like image below. Make sure that all set right than you may click OK.

Than your Mercury text is done. You can save the style option if you want, so if you want to use it again you just do a simple click on it and done.


0 comments:
Post a Comment