
2. Choose brush tool and set use airbrush soft round with master diameter 500px and hardness 0%. Change foreground color with #509E26. Click on up left corner of the canvas. 3. Change the diameter to 400px and change foreground color to #D3F24F. Click again on the same place. 4. Change foreground color to #194105 and click on upper right of the canvas. 5. Still use brush tool, but this time choose Scattered Maple Leaves brush and change Master Diameter to 55px. 6. Change foreground color to #385F16 and spray the brush from upper left corner to upper right corner of the canvas. 7. Change Master Diameter to 55px and opacity 30%. Spray the brush from upper right corner to middle right corner. 8. Change Master Diameter to 30px and opacity 10%. Spray brush on middle right canvas, near light color area. 9. Still use brush tool but this time we use Dune Grass brush, set Master Diameter to 112px, change opacity back to 100%. 10. Change foreground color to #A4D479 and background color to #38F516. Spray the brush from lower left to lower right of the canvas. 11. After that change foreground color to #629633 and back ground color #1B3405. Spray the brush on lower area of the canvas. 12. Now create a new layer. Change brush style to Scattered Maple Leaves and set master diameter to 43px. Change foreground color to #FFFFFF. Spray the brush on upper left corner. 13. In menu choose Filter > Blur > Radial Blur. Set Amount size 100, Blur Method: zoom, Quality: good and move Blur Center to upper left corner. 14. Finally the green field is done. Congrats!
At first time I use Photoshop program, I don’t think if this program can make a picture like this without the real photo. But since I got this tutorial I know this program can make many picture if I know the way to make it.More...
1. Make new file 1024 x 768 pixels. Change foreground color with green # 3C6720, than use paint bucket tool and click on the canvas.


Saturday, July 12, 2008
GreenField
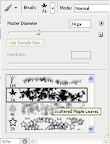
Subscribe to:
Post Comments (Atom)


2 comments:
THats really awesome
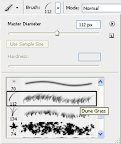
Terimakasih panduannya.
Post a Comment