

This time I learn how to make Spiral text and I think this technique have higher difficulty level than I learn before. But don’t worry, with good tutorial and patient I believe you can make it too. In this section I tried to learn how to use Wave Distort filter, Path Selection Tool, Direct Selection Tool, and Work Path layer. Lets see the tutorial, you can download Ebook here... or keep read More...
1. Make new file with dimension 800x800px and resolution 72 pixels. Press CTRL + DEL to fill canvas with black. Activate ruler press CTRL + R, then right click on ruler and define size in pixels. Create guide horizontal and vertical lines. Just click on ruler and drag the ruler to the middle of canvas.

2. Activate Rectangular Marquee Tool and create selection area half size of the canvas. Press ALT + Del to fill selection area with white.

3. Loose selection use CTRL + D. On menu choose Filter>Distort>Twirl, define Angle: 999 to create clock wise spiral. Then press CTRL + F to repeat the filter one more time.

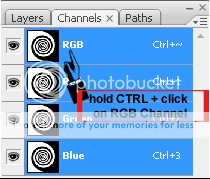
4. Activate Channel palette and use CTRL + Click on RGB channel to make selection. After you create selection area, activate Path palette (on menu Window>Path ).

5. After you activate work path, press CTRL + Del to fill background with black. This step will make easier on editing path.

6. Activate Direct selection tool.

7. Using Direct selection tool, choose third line from inside the spiral and then press Delete on your keyboard.

8. Still using Direct selection tool, click on black area to deactivate path. Now click on left third line then press Delete key.

9. Click on black area again to deactivate path, now click on middle of the spiral path and press Delete key to delete it.


10. Still using Direct selection tool, now choose outline of the spiral and delete it.

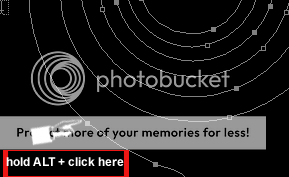
11. Click on black area to deactivate path, now hold ALT + click left outline the spiral. Press DEL key after all path are selected.
12. Now you got path to place text on it. This is one of Photoshop feature that may be any program don’t have it. Activate Horizontal type tool and point your mouse to the path then type your text.

13. There you go, you have spiral text now. You can add more style or changing size of the font and rotate it. Congratulations!!!


2 comments:
hmm I am just wondering when can I use this if ever I spend the time learning it.. Maybe just for a little fun?.. Thanks for the visit and have a great day to you
Ester's Embracing Health
Ester's Health Blog
Brief Sentiments
nice one...the message is pretty ironic, you want your readers/viewers to be comfortable while learning the mind-boggling (for me) stuffs you got here, but my eyes got sore reading your circular message, lol...nice to be here! goodluck!!!
Post a Comment